This content is private

Enter the password to continue.

Incorrect password. Try again.
Begin Your Story — $24

Vintage Story Wiki

Community-driven knowledge base

3,028Articles
240+Contributors
14Languages
6Years Active

Playing the Game

New to Vintage Story?

Start here — everything you need to survive your first days, from knapping flint to building shelter.

Read the Getting Started Guide →

Modding the Game

Quick Start Tutorial

Get your first mod running in 15 min

Modding Basics

Understand the framework

Content Mods

Add items, blocks, recipes

Code Mods

C# with full API access

Game Updates

Community & Resources

Knapping

English ▾ (+14 languages)

Contents

  1. Acquiring Stones
  2. Knappable Stones
  3. Shaping Stones
  4. Finishing the Tool
  5. Notes
Player knapping
Seraph knapping a stone tool

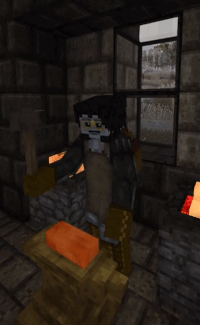
Time to make your first tools! Knapping is one of the earliest types of crafting available to the player, which allows them to make primitive tools and weapons out of stone.

Acquiring Stones

Loose stones, flint and obsidian can be found on the ground when foraging. You can collect them by right-clicking.

By order of resulting tool strength, the best stones for knapping are: Obsidian > Flint > All other stone types.

Knappable Stones

Only certain materials can be used to craft tool and weapon heads:

ImageMaterialDescription
Stone
StoneThe most common material. Only certain types can be used: granite, andesite, chert, basalt and peridotite.
Flint
FlintFound commonly alongside other loose stones. Slightly better for tool heads, and can make arrow heads.
Obsidian
ObsidianFound in areas where the top layer of rock is basalt. The best non-metal material for tools.

Shaping Stones

Knapping surface

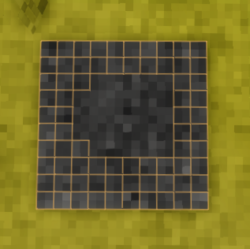
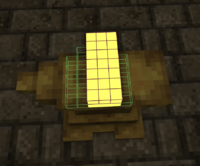
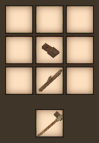
To begin knapping, place a valid stone in the crafting area. You'll see a 5×5 grid representing the stone's surface. Left-click to remove voxels, shaping the remaining material into the tool pattern shown on the right side of the interface.

  • You need two stones of the same type to begin
  • Removed voxels cannot be replaced — plan carefully
  • The pattern must match exactly

Finishing the Tool

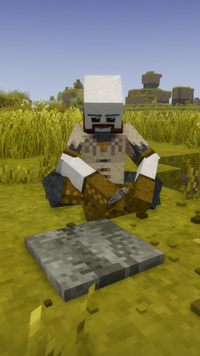
Once the pattern matches, the tool head is created automatically. Combine the head with a stick using grid crafting to create a usable tool.

Stone tools

Notes

  • Knapped tools are the weakest tier but essential for early survival
  • Progressing to smithing unlocks metal tools
  • Some players skip to flint for better durability
Categories:GuidesCraftingStone Age

Smithing

English ▾ (+11 languages)
This page was last verified for Vintage Story version 1.20.6.

Contents

  1. Required Materials
  2. Preparing the Ingots
  3. Smithing the Item
  4. Hammer Modes
  5. Smithing List
Smithing animation
Seraph smithing on an anvil

Smithing is a powerful way to form metal ingots into crafting components, armor materials, and tool and weapon heads. It requires an anvil, hammer, tongs, a forge with fuel, and metal ingots.

Required Materials

To smith items, a player needs:

Tip: Plates can also be used to smith items, not just ingots.

In the case of Copper and Bronze Alloys, the metal must be casted to form ingots using the crucible and clay molds prior to working them in the anvil. Iron ingots require preparation using a bloomery.

Preparing the Ingots

  1. Load the forge: Add up to 5 fuel (coal or charcoal) to the forge, then add up to four ingots.
  2. Ignite the forge: Ignite with a torch. Most metals can be worked when heated above 50% of their melting point.
  3. Check temperature: The ingot must glow orange/white to be workable. If it cools, reheat it.
  4. Place on anvil: Use tongs to grab the hot ingot and place it on the anvil.

Smithing the Item

Smithing interface

The smithing interface shows the current work item on the left and the target blueprint on the right. Use different hammer modes to add or remove metal voxels until the work item matches the blueprint.

Hammer Modes

Hammer modes

Press F to cycle through hammer modes. Each mode shapes the metal differently:

  • Hit: Removes a single voxel
  • Upset: Adds a voxel from an adjacent position
  • Split: Removes a row of voxels
  • Shrink/Stretch: Moves voxels directionally

Smithing List

Items that can be smithed include:

CategoryItems
ToolsPickaxe, Axe, Shovel, Hoe, Knife, Saw, Shears, Chisel, Hammer
WeaponsSword, Falx, Spear head, Arrow head
ArmorChain armor pieces, Scale armor pieces, Plate armor (advanced)
ComponentsNails, Metal plates, Anvil parts, Lantern parts, Iron fence
Categories:GuidesCraftingMetalworkingIron Age

Farming

English ▾ (+12 languages)

Contents

  1. Required Materials
  2. Finding Seeds
  3. Soil and Farmland
  4. Nutrients (N-P-K)
  5. Crops
  6. Protecting Crops

Farming is a game mechanic allowing players to cultivate food crops for cooking, fiber crops for linen production, and grain crops for animal feeding. It is one of the most reliable sources of sustainable food.

Required Materials

  • Quality soil (medium or high fertility)
  • Seeds — found by foraging or breaking wild crops
  • A hoe to convert soil into farmland
  • Optionally: a watering can for faster growth

Finding Seeds

Seeds can be obtained by breaking wild crops found in the world. Different biomes and climates have different crops. You can also find seeds in cracked vessels and in abandoned structures.

Tip: In colder biomes, look for wild crops during spring and summer. Most wild crops will not survive winter.

Soil and Farmland

Not all soil is created equal. The fertility of soil directly affects crop yield:

Soil TypeFertilityNotes
Barren5%Almost useless for farming
Low25%Poor yields, needs fertilizer
Medium50%Decent yields, most common
High65%Best natural soil for farming
Compost-enrichedUp to 100%Player-created with fertilizer

Use a hoe on soil blocks to create farmland. Farmland must have access to water (nearby water source or rain) to maintain moisture.

Nutrients (N-P-K)

All soil has three nutrient levels: N (Nitrogen), P (Phosphorus), and K (Potassium). Different crops consume different nutrients:

  • Grains (spelt, flax, rice, rye) — consume mostly N
  • Vegetables (onion, carrot, turnip, cabbage) — consume mostly P
  • Legumes (soybean) — consume K but add N back to the soil

Crop rotation is essential for long-term farming sustainability. Planting the same crop type repeatedly will deplete specific nutrients.

Fertilizers

FertilizerPrimary NutrientSource
PotashK (Potassium)Burn wood, collect ash, leach with water
SaltpeterN + KFound in caves, mined
BonemealP (Phosphorus)Crush bones in a quern
CompostBalanced N-P-KRot food and plant matter in a barrel

Crops

Vintage Story features a variety of crops, each with unique growing requirements:

CropTypeGrowth TimeNutrient
SpeltGrain~30 daysN
FlaxFiber~28 daysN
OnionVegetable~18 daysP
CarrotVegetable~18 daysP
TurnipVegetable~16 daysP
SoybeanLegume~24 daysK (adds N)
RiceGrain~32 daysN

Protecting Crops

Hares will go after planted crops and eat them. To protect your farm:

  • Build fences around farmland (at least 2 blocks high)
  • Use pit traps or moats around the perimeter
  • Keep a wolf nearby (tamed animals deter hares)

Crops are also affected by seasons — most crops will only grow during spring and summer. Plan your planting schedule accordingly.

Categories:GuidesResource GatheringFoodAgriculture